
How to Build a Gamified System in Notion (Step-by-Step)
- Lux Seminare
- May 20
- 4 min read

How to Build a Gamified XP System in Notion (Step-by-Step)
Ever wanted your Notion workspace to feel more like an RPG? Where completing tasks gives you XP and you level up as you make progress?
I spent days building this part of my devhub system, so you don't have to. Here's how to create it from scratch.
What We're Building
By the end of this tutorial, you'll have:
✅ Tasks that award XP when completed
✅ A character sheet showing your level
✅ A progress bar
✅ A Completion Badge
TIME TO BUILD: 30-45 minutes
The Concept
The basic flow:
Complete a task → Earn XP
XP accumulates → Level increases
Progress bar shows how close you are to completing the task
Completion Badge - your reward for finishing the task.
Simple, but effective for motivation.
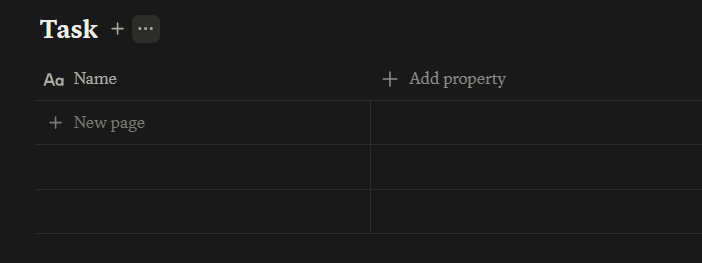
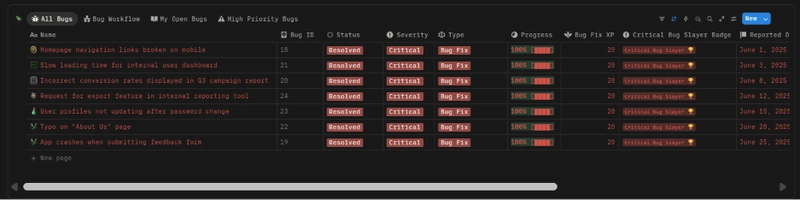
Step 1: Create your Task Database
Create a new page in Notion. Give it a title.

Create a new database then name it "Task". Table view works best.

Properties you need:
1. Title (Default)
2. Status (Select)


3. Priority (Select)


4. Assigned to (Person - Optional)

5. Progress (Formula)

6. Badge (Formula)

7. Task Value (Formula)
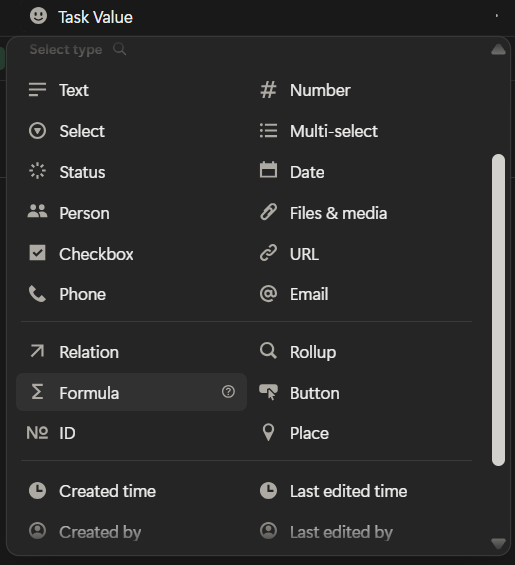
8. XP Earned (Formula)

9. User (Relation)

10. Is Done? (Formula)

Status Options (You can customize):
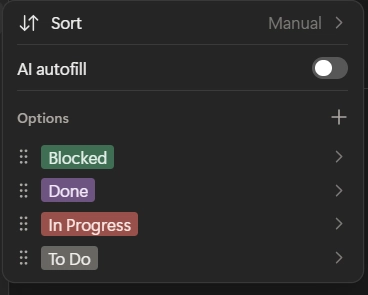
- To Do
- In Progress
- Done
- Blocked
Priority Options (You can customize):

- Low
- Medium
- High
Progress Bar Formula (You can customize the progress bar):

if(
Status == "Done", "100% ██████████",
if(
Status == "In Progress", "50% █████",
if(
Status == "To Do", "0% ░░░░░░░░░░",
if(
Status == "Blocked", "Blocked",
"0% ░░░░░░░░░░"
))))
Badge Formula (You can customize the text and style):

if(Status == "Done", "🌟 Task Mastered!".style("c", "b", "green", "green_background"), "")
Task Value Formula (You can customize the XP value):

if(Priority == "High", 10, if(Priority == "Medium", 5, 1))
XP Earned Formula

if(prop("Status") == "Done", prop("Task Value"), 0)
After you create your User Database, relate the User property to it.


- Related to: User
- Limit: No limit
- Two-way Relation: On
Is Done Formula

if(Priority == "High", 10, if(Priority == "Medium", 5, 1))
Step 2: Create your User Database
Create another database then name it User. Set it up on table view first.

Properties you need:
- Title (Default)
- Tasks (Relation) (If you already created the User property on the Task Database, then skip this).
- Tasks Completed (Rollup)

- Tasks XP (Rollup)

- Tasks Completion (Formula)

Click "New Page" on the database then put your name or anything under the title property (e.g. Lux Seminare).

Tasks Completed Rollup Setup
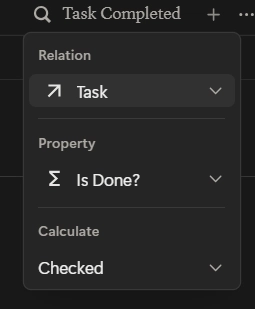
- Relation: Task
- Property: Is Done?
- Calculate: Count → Checked
Tasks XP Rollup Setup

- Relation: Task
- Property: XP Earned
- Calculate: More options → Sum
Tasks Completion Formula (Note: The levels are based from DevHub Pixel Forge Theme, feel free to customize it together with the XP goals.)

if(Task Completed >= 100, "Impact Driver ⚒️".style("", "red_background"), if(Task Completed >= 50, "Productivity Powerhouse 🦾".style("", "purple_background"), if(Task Completed >= 25, "Task Conqueror ⛳".style("", "blue_background"), if(Task Completed >= 10, "Task Initiator 🎲".style("", "brown_background"), if(Task Completed >= 5, "First Step 👣".style("", "gray_background"), "")))))
Step 3: Task Template
Go back to Task Database.
On the upper right side, click the blue drop-down button beside "New".

Click "New Template".

Click "New Page" then name it to something like "New Task".

Click "User" then select your name.

Go back to Task Database again.
On the upper right side, click the blue drop-down button beside "New" again.

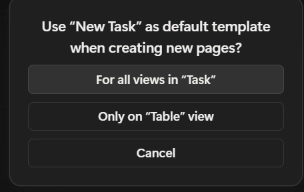
Click the three dots (...) beside "New Task" or whatever you've named the task template.

Select "Set as Default".

Step 4: Make it Yours
Now that the "engine" of your XP system is running, it's time to skin the game. This is where you transform a boring database into a dedicated RPG interface. You've got the logic; now give it some soul.
Upload your customized icons and covers.
The Character Sheet View
- In your User Database, create a Gallery View.


- Set the Card Preview to "Page Cover" and the Card Size to "Large".


- Go to Properties and toggle on "Tasks Completion" and "Tasks XP"


- This creates a visual player card that feels like an actual RPG character menu.
- Create different views so you could have your own dashboard.
The goal here is to make the workspace so visually rewarding that you want to open it every morning. Experiment with Notion's grouped views, sub-tasks, and tabbed databases until the flow feels natural to your specific dev workflow.
What's Next?
To expand this, you could add:
Project Tracking (quests with multiple tasks)

Bug Tracking System
All Docs Database

Learning Path Tracker

Habit Tracker

Daily Log Database

Achievements Page

I spent weeks building all of that into a complete system.
If you want the full thing, get it here. It comes with free version, with core databases but minus the gamification.
If you want to build it yourself: Use this tutorial as a starting point and customize it however you want!
Happy to answer questions in the comments. 👇

Comments